Create Your Countdown


Assignment for today...


TODAY we are going to make a countdown webpage.

Step one: download or copy the project files.


http://www.pps.k12.or.us/schools-c/pages/lane/pages/countdown.zip


Step two: Change the countdown date and time.


Right click on countdown.htm and choose Open With > Notepad.


Change these to the correct date and time for when you want to countdown a date and time to:

You could count down to, winter break which starts December 14th
Hanukkah which this year starts on December 8th
Christmas day December 25
Spring break which is march 22nd

Another significant upcoming date?...

*note, right now they are set to New Years 2013.


var year=2013    //-->Enter the count down target date YEAR


var month=01      //-->Enter the count down target date MONTH


var day=01      //-->Enter the count down target date DAY


var hour=01      //-->Enter the count down target date HOUR (24 hour clock)


var minute=01    //-->Enter the count down target date MINUTE


EXAMPLE:


var year=2012    //-->Enter the count down target date YEAR


var month=12      //-->Enter the count down target date MONTH


var day=8      //-->Enter the count down target date DAY


var hour=01      //-->Enter the count down target date HOUR (24 hour clock)


var minute=01    //-->Enter the count down target date MINUTE


Step THREE
Find a picture that represents, or shows what significant day you are counting down to.


Save it in place of the other picture, if you want you can edit, but you do not have to.


WHEN YOU ARE DONE.

Rename your countdown folder to your name, example:   hurst_countdown.

Right click on the folder > send to > compressed (zipped) folder.
Upload zipped file.


password: lane


http://dropitto.me/lane <- click this to upload completed file.

Holiday Photo Phun - Jib Jab


Locate your picture in the folder:
Step 1: Click on "My computer"
Step 2: Click on "Dept on 'Nwlane1' (X:)"
Step 3: Click on media > 2012-2013 > picture day


Step 1: In another tab (right click open in new tab) go to this link http://sendables.jibjab.com/holidays/category/christmas/pictures

Step 2: Choose a school appropriate holiday card that you can put your face, or you and some friends faces into.

How to download an image that you cannot right click and save as.


There are many ways to do this I will show you what I feel as the easiest method.


Step 1: Open the application "Picasa 3" (Start > Programs > Picasa 3)
Step 2: Go back to the website that has your image that you want and press the keyboard key "PrtScn"


Step 3: Go back to Picasa 3, on the left under "Projects" click on "Screen Captures" double click to open the captured screen shot.
Step 4: Top left "basic fixes" click "Crop" drag select the area of the picture you want to keep, then click apply.
Step 5: File > Save As -- Save to your Y drive, rename if you want


Upload it here:
password: lane


http://dropitto.me/lane

GIMP a silly animated face


Step 1. open GIMP (Start > program files> GIMP 2...)

Step 1.1 Find and drag into GIMP your picture day photo. (My Computer, X drive...)
(X:\Media\2012-2013\picture day)

To find your picture.
Open the INDEX.txt then use the FIND to search for your name, look at the file name on the left and then go get it.

Step 2. In GIMP: click Filters > Distorts > Iwarp
Step 3. On the Animate tab click "Animate"
Step 4. Drag the slider up to 10.
Step 5. Check Ping Pong,
Step 6. On the settings tab move parts of your face to make a silly or interesting animation, then click ok.
It has now created the frames inbetween the start position and the end position for you.


Step 7. Save the animation as filename.gif          IN your Y drive.
Step 8. after you click save the window "export file" choose to "Save as Animation"


Watch your animation by dragging the file.gif into a browser, (Internet Explorer, Chrome)

Then upload the completed file to me using drop it to me.
password: lane

http://dropitto.me/lane <- click this to upload completed file. 

Cyber Monday


Welcome back from supper:
Play this shopping game.


Hand Turkey

Today we are going to learn a web painting program and practice hand eye coordination drawing a hand turkey.


Yes you will literally put one hand on the computer monitor screen and trace it using the mouse.   This is a practice of eye hand coordination.

create your hand turkey here:
http://www.onemotion.com/flash/sketch-paint/


Remember to make a background for the turkey, several colors and save the turkey picture to your Y drive.

Then upload the completed file to me using drop it to me.
password: lane

http://dropitto.me/lane <- click this to upload completed file. 

Chrome Theme


Step one, use the browser Google Chrome

Feel free to try out this Lane theme. 

The themes, or skins for various applications make the GUI (Graphic User Interface) fun to use and personalized to your own style. Today create a theme using this website below and then send me using Drop it to me the finished "pack and download theme" file which ends in the extension .crx.

http://www.chrometheme.net/chrome-theme-creator-online.html <- CREATE IT HERE.

Be creative, do whatever you want for colors and pictures (school appropriate).


Step 3. Once you have finished. "Pack and download theme"

rename it to your name.crx

hurst.crx

Then upload the completed file to me using drop it to me.
password: lane

http://dropitto.me/lane <- click this to upload completed file. 

Sugar in candy spreadsheet


Today we are going to look up facts about candy and how much sugar is in them. Then we are going to take those facts and assemble them into a collaborative spreadsheet. 

Everyone will have a different column, be respectful and just work on your own column, don't mess with others.
I can ban from free time and assign typing practice to those trolls that are not contributing to this healthy learning environment.

Click HERE to get started

Vector vs Bitmap

Today we are going to learn in a hands on way about vector image files verses bitmap image types.

The scenario is that you've found this small image and want to use it covering the full screen.


The screen you are on has 1024 pixels wide and 768 pixels tall,  to make this pumpkin image fill the whole screen you need to re-size it to around 1000 wide, lets do that and see what happens.


If you download and use the Bitmap image file, as you scale the image larger it will look blotchy or blurry.

Basically a bitmap image is made up of pixels, tiny dots that made the picture show, this pumpkin image has a pixel definition or size of 150 pixels or dots wide by 137 tall that is quite small and would be considered a low resolution image.
As the individual pixels times by 6 (150 x 6.66 = 999) they will duplicate over and over six times so that the original pixels that made the image are in the same places relational to each other just larger on the screen.

This process is called Pixelization.

Lets do this so that it makes a little more sense.

First load the program Inkscape
(Start > Programs > Inkscape)


Second download this image and open it in Inkscape, or copy and paste this image into Inkscape:
Then export the bitmap (File > Export Bitmap) and set the width to 1000.

Save to Y drive, give it a name, then go look at the image and see what you think of it.

Vector images are geometrical primitives such as points, lines, curves or shapes which the computer makes based on mathematical expressions that represent images. These mathematical expressions are not connected to exact pixels like a bitmap is so that if you want the shape larger or smaller the computer can simply multiply the math that makes that image to get a larger image. Let's try it out and see..

This time while in Inkscape click Path > Trace Bitmap.  Then click Ok.    (This will turn the bitmap into a vector)

Next select and move the pumpkin vector away from the pumpkin bitmap. 

With the vector selected you can change the color if you want, other wise simply export it as a bitmap to Y drive, with the width 1000 pixels again and go compare it with the first.

Compare the two images that are in your Y drive, maybe have them named bitmap.png and vector.png.

If you would like you can turn them into me, but mostly I just want to see that you completed this exercise so that we can build on this concept in later assignments.


password: lane

http://dropitto.me/lane <- click this to upload completed file. 


Blender Game Engine (BGE)

Today we are going to learn a little about making video games.

First download this file.
www.pps.k12.or.us/schools-c/pages/lane/pages/bge_spider.blend

Once opened in blender put your mouse on the spider and press P.

wasd, space to move.

Then look on the left to see the sensors and the actuators, expand using the arrow one or two of them to see what input is causing what result.

Try changing colors, sizes, inputs, adding objects, anything to basically learn how this game was put together.

Carve a digital pumpkin


Get started here - theoworlds.com/halloween


Once finished, click DONE CARVING, Done and then the Internet address (URL) copy and paste as a blog comment using the name URL profile.

Make a web page, learn basic HTML code


http://htmledit.squarefree.com/

Today we are going to learn some basic HTML code.

In one tab keep these directions open, in the second tab open this HTMLEDIT.SQUAREFREE.COM site.

WHAT DO YOU NEED TO PUT IN YOUR WEB PAGE?
You can be creative with the wording and images, just so the message remains the same.

Title:
Dance, or Halloween Dance, or Harvest Dance, or fall dance, or autumn dance... etc... You give it a title.

Picture:
Go find an image that shows dancing and copy the URL, (website address).

Information:

$3.00
or
1 quasar = 10 cents


Dance is welcome to ALL students

Permission slip required


Start by setting the background to a color.
<body style="background-color:orange;">

This is how to put a title or heading in:

<h1>This is a heading</h1>
<h2>This is a heading</h2>
<h3>This is a heading</h3>

This is a horizontal line:

<hr>

This is how to put in image in:

<img src="THE IMAGE URL">

Example:
<img src="http://www.dance.uptownuk.com/images/streetdance.jpg" width="500" height="400">

This is the code for text size and colors, you apply it within a section, see example.

font-size:55px

style="color:green"

Example: <h3 style="color:DodgerBlue; font-size:30px">School Dance</h3>

Names of colors


Copy the final code to a text document file on your Y drive.

Go to Y drive, Right click, Add new text document.
  (IDEALLY name this text document your name_dance.txt, or yourname_dance.htm).

Open and then paste code, save.


Then upload the completed file to me using drop it to me.
password: lane

http://dropitto.me/lane <- click this to upload completed file. 


Design your logo

First, what is a logo?

A logo distinguishes, identifies  signifies, indicates, symbolizes or represents you or your company/organization, it should be easily recognizable while personal to you.

Look, at some famous logos and see if you can recognize them.
Logo's should be recognizable even if not in color:
Can a logo change over time? Click here to see example.


Today's assignment: Create your own logo using Inkscape.
To get started imagine, brainstorm, visualize what you think a cool logo would look like, consider words that might describe you, or shapes that you identify with. 

Save as logo.svg to your Y drive.

Columbus Day Timeline

Research two Christopher Columbus facts that have dates to add to our group time line.


When was he born?
When did he die?
When was a local storm named Columbus day storm?
What happened on the 400th anniversary?
When was it a holiday?
When was it a federal holiday?
???


Login: ppslane@gmail.com
password: student


Each time line event MUST have an image also.


*Be sure to put your first name in the description of your additions to the time line.


After Supper
Complete this game.
http://www.flashgame6.com/39609/the-discovery-of-america

Initial name in Three dimensions

Today we are going to make your name in 3d where the first initial is the 3D object and the rest of the letters are cut into your first name initial. 

First Steps:
Launch the program Inkscape.


First create and edit your name in your choice of fonts, with the first letter being large and the remaining letters small and fitting on top of the first.
SELECT BOTH OBJECTS (by drag selecting both, OR by holding SHIFT and clicking on both)
Next click Path > Difference.

File Save, or save a copy, or save as, whichever is first and works for you to save the file to your Y drive.
Make sure to rename the file you are saving your name.

Next Steps:
Launch the program Blender.


Delete the cube, by right clicking on it
to select it, then pressing the delete key.
File > Import > Scalable Vector Graphics (.svg)
Locate and import your file that you just saved from Inkscape, should be in your Y drive, should be renamed to your name.
Click Origin > Origin to Geometry
Click View > Camera
Use the mouse and keyboard keys G to grab and move, S to scale to position your name in front of the camera.

Use mouse wheel to scroll over to "object data" the two dots and curved line icon
Then on the Geometry : Ex: put either .1 or .2 or similar.

Render by pressing the keyboard key F12

Then Save the image by pressing the keyboard key F3
SAVE TO YOUR Y DRIVE.

IF YOU WANT TO DO EXTRA TO MAKE IT LOOK DIFFERENT...
Feel free to add a background mesh plane and change material colors, add various lighting and rotate the name around to get it to look how you want. Feel free to ask and describe what you image it looking like and Mr. Hurst can help.
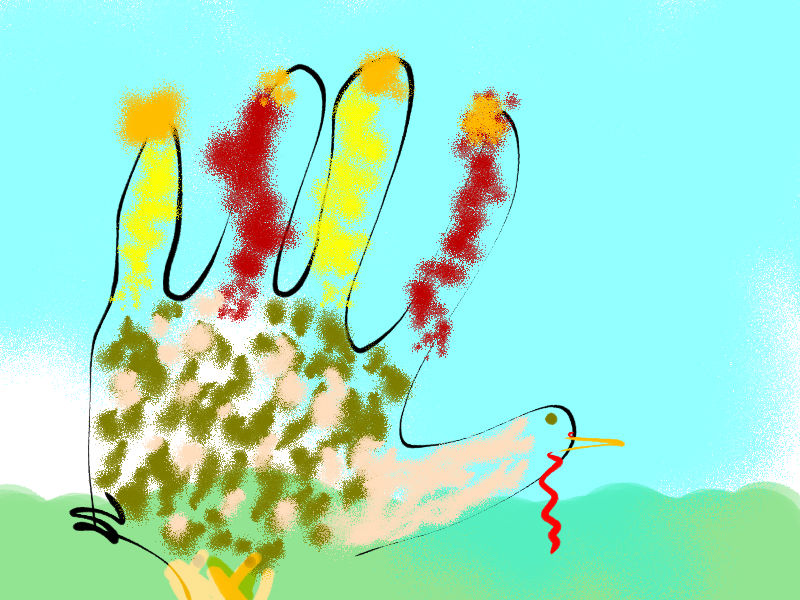
See below examples.

Three Dimensional Layers

Learn about 3D and Layers.

Make something recognizable. A bird, chair, horse, cat, car, logo, etc. anything that is more than just random chunks of blah.


Turn it in by posting the finished URL as a comment.

To comment on blogspot, click the "0 comments" on the bottom of this page.

Comment as: Name/ URL from the drop down.

FIRST DAY!! - - Who are you, who is Mr. Hurst?... - Tech Savvy Survey


Today you are to fill out both of these forms, after you fill these both out we can hang out get to know each other, have free time on the computer, etc.

Get to know Mr. Hurst, and let Mr. Hurst get to know you


How Tech-Savvy Are You?

Our last day...

http://ie.microsoft.com/testdrive/

Chrome Theme


Step one, use the browser Google Chrome

Feel free to try out this Lane theme. 

The themes, or skins for various applications make the GUI (Graphic User Interface) fun to use and personalized to your own style. Today create a theme using this website below and then send me using Drop it to me the finished "pack and download theme" file which ends in the extension .crx.

http://www.chrometheme.net/chrome-theme-creator-online.html <- CREATE IT HERE.

Be creative, do whatever you want for colors and pictures (school appropriate).


Step 3. Once you have finished. "Pack and download theme"


rename it to your name.crx


hurst.crx


Then upload the completed file to me using drop it to me.
password: lane

http://dropitto.me/lane <- click this to upload completed file. 

Spirit Week - Teamwork Info graphic


Today we are going to work on a teamwork assignment,
Pair up with one or two other people and then create this spirit week info graphic.

Find pictures for each themed day.
As you see in the examples, feel free to be creative while still communicating each day.

Use Google Chrome as your browser

COPY and PASTE using RIGHT CLICK COPY ON THE PICTURE, then CTRL + V on the Google Drawing.

Choose a team and get started.
Once one team name / project is taken move to a different one, I can change the team names if needed but it'd be after we get started so you would have to refresh the page.


Heat and Electronics


A computer and it's processor takes electricity and moves it quickly through transistors and circuits in order to do things the faster it works the warmer it will get.

This heat needs to be cooled down otherwise it will slow down the computers ability to move the electricity and thus slow down your computer experience.

Computers use Heat Sinks which are usually made of aluminum to move the heat away from the processor and then fans to blow the hot air away.


Typical desktop computers should be around 100-125 degrees at their processor.

The max heat a desktop should ever be is 180 to 190 degrees, this heat is located at the processor and will overheat if any higher.

Once a computer overheats it will shut down automatically in order to save it from harming any of it's parts.


Dust is bad for computers and other electronics because it slows down the cooling fans that are trying to move the hot air out. Also it makes it so air can not flow away from the hot areas as well causing overheating a lot easier.

Some Computers use other methods that wouldn't be affected by dust like water to cool down the processor. Water and electricity are usually not good things to combine but in these specific uses with controlled flow it is an effective way to cool down super computers and gaming computers that use a lot more electricity and work faster than normal computers.

Most electronics follow this same idea, some however are not as powerful or do not move as much electricity so they do not get as hot, and do not need as much to cool them off.

Sometimes electronics can malfunction causing a massive overheating, this is uncommon but possible.
 Again typically they have built into them ways that they automatically turn off and don't let you use it until it is  cooled down again.

What you can do about it..

If it's overheating, turn it off and let it chill out.
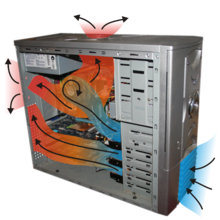
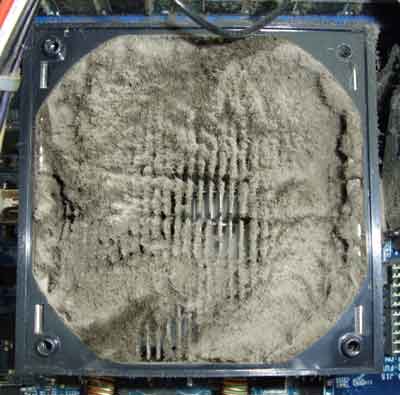
Make sure to ask permission before working on any electronics but making sure they are cleaned with compressed air or some vacuum cleaners that can also clean electronics, sometimes simply blowing the dust out with your own breath is helpful.
Turn on a fan, open a window, make sure nothing is covering the vents or fans of electronics and so they have room to get the heat out.
Limit the use of electronics in extremely hot conditions.

Take this little quiz.


Burn something (simulated)!!!